Skip to content

作者: devi

貨幣革命 雲端挖礦

各位應該都知道近日比特幣(Bitcoin)價格大增,由以往的20美金到今天的2000多美金,短短時間內就升值了一百倍。小弟從去年年尾開始接觸虛擬貨幣,最初接觸當然是比特幣(BTC),找到了一些可以使用電腦的CPU和GPU來挖BTC的軟件,但由於家中電腦的CPU比較舊,GPU也是使用Nvidia的品牌的顯示卡(N卡不適合挖礦,AMD的卡才適合),而且暫時也不打算更換CPU和GPU,所以用作挖礦的運算力非常低。

後來在外國亞馬遜的網站上購買了一個價值600多港幣的USB ASIC Miner,打算可以提升挖礦的算力,但結果現在在礦池挖了BTC半年有多,回本期也是遙遙無期。

若想要參與這場貨幣革命,你需要有一定的資金,組合一部有不錯硬體設備的電腦才能挖,或是買一些專用的挖礦裝備(專用礦機),要不就是直接用資金買幣囤積起來,待日後該貨幣升值而致富。上述兩種都需要有一定的資金,不適合月光族的小弟。然而有次機遇,從別人口中得知雲端挖礦的存在。什麼是雲端挖礦(Cloud Mining)?主要是透過大型的資料中心來採集加密貨幣(CryptoCurrencies),通常會在電力成本低的地方來設置。礦工不需要擁有自己的機器來挖礦,可以直接投資這些雲端挖礦公司,來取得算力以用來分攤電力成本、設備維護費用等等。雲端挖礦公司則將會所採集到的加密貨幣,依據當初各人購買的算力來進行分配。

由於挖礦需要一定的硬體設備才能挖,而且電腦或礦機也要一直開著,其實還挺浪費電的,電力的成本也需要計算在內,所以小弟認為自己挖礦不划算,因此我就接觸了雲端挖礦。最初當然是小試牛刀,先用小量資金購買算力,我在今年一月初於其中一間雲端挖礦的公司使用了84美金來購買挖掘比特幣BTC的算力和33美金來購買挖掘以太幣(Ethereum)ETH的算力。現時大概半年了,BTC還沒有挖到回本的水平,但ETH方面則已挖了100多美金的幣值,不止回本還已經在賺錢了。
考慮到比特幣已經錯過了最佳的參與時機,而其後出現的各種加密貨幣也在不斷的升值,提前挖掘別種貨幣或許能搶先賺到一筆!現時我個人會推薦以太幣ETH,基本上它是BTC 2.0,幣值和認受性也在不斷地增長。

開始挖礦之前請記得開通相應貨幣的錢包,以下是我正在使用的錢包和推薦的雲端挖礦公司:

  1. Hashflare(鏈結含招待碼,進入網頁後請先按Ctrl+F5清除Cookies,謝謝^^)
  2. Genenis-Mining(填寫招待碼seVRL8可以有3%折扣,可以無限使用,謝謝^^)

Raspberry Pi的備份與還原

這裡介紹在Windows、Linux與OSX中,如何備份與還原Raspberry Pi的記憶卡。

Windows

在 Windows 中若要備份或回復記憶卡的資料,可以使用Win32 Disk Imager這個開放原始碼的免費工具。

Win32 Disk Imager 是專門用來備份 USB 手指、記憶卡的小工具,安裝好之後,先將記憶卡插進電腦,並執行 Win32 Disk Imager,就會看到這樣的操作畫面。

首先選擇備份影像檔的儲存路徑與檔案名稱(Image File),然後選擇要備份的設備(Device),接著按下「Read」按鈕即可將記憶卡的資料全部備份至檔案中。

如果要從備份影像檔中將資料還原至記憶卡,則按下「Write」按鈕即可。

把VNC設置成開機服務(Jessie)

此文章用於把VNC設置成開機服務。

1. Install Tight VNC server:

sudo apt-get install tightvncserver

2. Start it manually and enter new VNC password.

vncserver :1

3. Create a new file /etc/systemd/system/vncserver@.service

4. (Optional) Replace the parameters in the unit file, if you want to.

5. Run

sudo systemctl daemon-reload && sudo systemctl enable vncserver@1.service

6. Reboot.

以下是/etc/systemd/system/vncserver@.service的內容:

開機自動運行VNC程式(Jessie)

此文章用於把VNC設置成開機啟動,如此方法不行,則可以參考另一篇設置成開機服務的文章。

  1. Install the VNC server.
    sudo apt-get install tightvncserver
  2. Launch vncserver for the first time to set up a password.
    vncserver :1
  3. Create a file as /etc/init.d/vncserver (be sure to modify the USER, GEOMETRY, NAME, etc.)
  4. sudo chmod +x /etc/init.d/vncserver
  5. sudo update-rc.d vncserver defaults

以下是/etc/init.d/vncserver的內容:

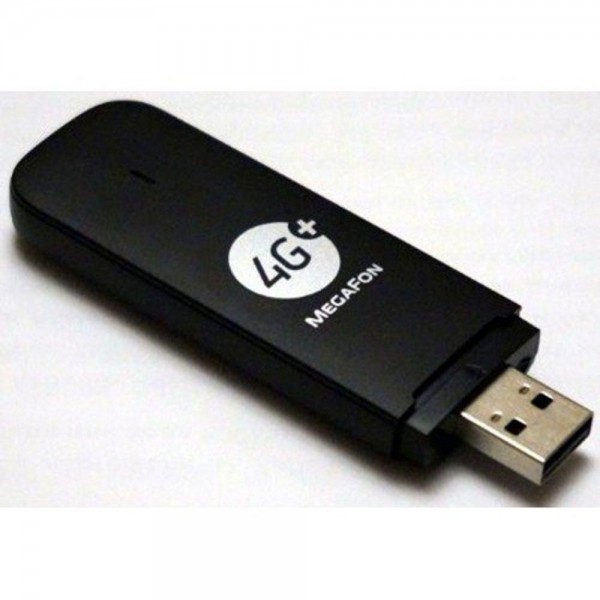
把Huawei E3372h-153更改成Modem模式

Modern Huawei USB LTE modems can be used in two very different modes. Default is HiLink mode where it functions as router doing NAT and other nastiness much like more traditional 4G routers connected over WLAN or Ethernet. Unsurprisingly default mode is HiLink, but luckily it can be changed to Stick mode getting rid at least one layer of NAT, fixing IPv6 support etc.

Actually there’s also third mode which is subset of Stick, instead of native NCM interface it uses legacy PPP over emulated serial port. This can be sometimes useful with older routers with USB port but you won’t be able to reach full speed in this mode.

Internet has plenty of information on how to do that. As it often is not all of that is true. Most interesting bits are also written in Russian. Despite huge improvements in translations from Google Translate it’s still bit hit and miss.

Following these instructions will also resolve Error Code 19 and “brick” with Error Code 13 (rapidly flashing green led). Which is also why some steps may seem bit pointless at first. Feel free to skip them and then start again from beginning when Mr Error #19 and Mrs. Error #13 bite you. 🙂

You’ll need Windows PC for this. I used 64-bit Windows 7 PC myself.

讓Raspberry Pi成為你的電腦開關伺服器

Note: This post and the accompanying software packages have been updated several times since this was originally posted. The most up-to-date releases and instructions can always be found in the GitHub Repo.

I have a very power hungry desktop computer that I use for video editing and large file storage. When I’m travelling with my laptop, I obviously can’t carry all my files and data with me, so I occasionally use “remote desktop” to access my desktop from the road. I also use a Plex Media Server to stream content from my desktop computer. However, the computer has to be on for me to be able to do this. This means I need to leave the computer on all the time, just in case I need to access it. This wastes power, costs me money, and harms the environment. My Raspberry Pi, on the other hand, consumes a minuscule amount of power, and is always on anyways, serving other purposes. In this tutorial, I’ll show you how to run a simple mobile-friendly website from your Raspberry Pi that will allow you to remotely wake up your power-hungry computer, so you can remotely access it. When you’re done, just put it back to sleep from within the remote desktop service (or use the mobile app plus a small background server running on your desktop to put it back to sleep – this is described in the instructions). The app pings the computer from the Raspberry Pi to inform you of when the computer has woken up and established network connectivity. Follow along after the break…

使用USB手指為Raspberry Pi安裝Raspbian系統

In this tutorial, I’m going to talk you through running Raspbian from a USB connected drive instead of from an SD card. Running from a USB connected Flash or Hard Drive has many advantages, the biggest being speed and reliability.

SD Cards have a limited read/write cycle, and when hosting a site with a MySQL database from a SD card, it won’t take long before you start getting corruptions and failures. USB Flash drives provide a cheap and reliable alternative. I’ve tested several USB Flash drives, and found Sandisk and Corsair to be the best for speed and reliability. This site is run off a 16GB Kingston USB 3.0 Flash drive.

Assumptions before we begin

I’m going to assume that you know your way around Terminal, and are using a Mac to perform these steps. You will still need an SD card to store the boot instructions to tell the Raspberry Pi to launch the OS from the USB; the Raspberry Pi’s can’t (yet) boot directly from a USB storage device.

MTP USB損毀導致無法讀取的解決方法

在使用手機與電腦連接過程中出現「裝置驅動程式軟體安裝不成功」,
並且在「裝置管理員」的MTP USB 選項出現了驚嘆號。
點進去想要更新卻出現下列的錯誤:
「Windows 無法啟動這個硬體裝置,因為它的設定資訊 (在登錄中) 不完整或已損毀。 (代碼 19)」
不用怕,以下兩部曲就能解決這個問題。